The Viking self-cleaning oven offers advanced features for effortless maintenance and hygiene․ This guide provides comprehensive instructions for safe and effective use of the self-clean function‚ ensuring optimal performance and longevity of your appliance․
Overview of the Self-Cleaning Feature
The Viking self-cleaning oven uses high heat to reduce food residue to ash‚ eliminating the need for harsh chemicals․ During the cycle‚ the oven locks securely‚ ensuring safety․ This feature is energy-efficient and eco-friendly‚ leaving a clean interior after a few hours․ The process is automated‚ making maintenance hassle-free․ Always follow guidelines to ensure optimal results and appliance longevity․
Importance of Following Manufacturer Guidelines
Adhering to Viking’s guidelines ensures safe and effective use of the self-cleaning feature; Proper procedures prevent damage to the oven and avoid potential hazards․ Failure to follow instructions may result in incomplete cleaning or appliance malfunction․ Always remove racks and utensils before starting the cycle to ensure even heating and prevent damage․ Avoid using chemical cleaners‚ as they can harm the oven’s finish and compromise its self-cleaning functionality․ Manufacturer guidelines also emphasize the importance of ventilation to prevent fumes from accumulating․ By following these steps‚ you maintain the oven’s longevity and ensure optimal performance․ Compliance with safety standards is crucial for both functionality and user protection․
Safety Precautions Before Using the Self-Clean Cycle
Ensure the kitchen is well-ventilated to avoid fume accumulation․ Remove all racks and utensils‚ and avoid using chemical cleaners․ Keep children away during the cycle․
Ensuring the Kitchen is Well-Ventilated
Proper ventilation is crucial during the self-cleaning cycle to prevent harmful fumes from accumulating․ Open windows and doors to allow fresh air circulation․ Turn on exhaust fans or range hoods to enhance airflow․ This helps remove smoke and odors effectively․ Ensure no one‚ especially pets or children‚ stays near the oven during this process․ The high heat and fumes can cause discomfort or health issues․ Maintaining good ventilation ensures a safer and more efficient cleaning experience for your Viking oven․
Safe Exterior Surfaces During the Cleaning Process
During the self-cleaning cycle‚ the exterior of your Viking oven‚ including the door and knobs‚ remains safe to touch due to CSA certification․ However‚ avoid using harsh chemicals or abrasive cleaners on the stainless steel surfaces‚ as they may damage the finish․ Instead‚ clean the exterior with hot‚ soapy water and a soft cloth‚ then wipe dry with a microfiber cloth to maintain the finish․ Avoid using oven cleaners on any exterior parts‚ as they can cause damage․ Always follow the manufacturer’s guidelines for cleaning to ensure the longevity and appearance of your Viking oven․
Preparing the Oven for Self-Cleaning
Before starting the self-clean cycle‚ remove oven racks‚ broiler pans‚ and utensils․ Ensure the kitchen is well-ventilated to prevent fumes buildup during cleaning․
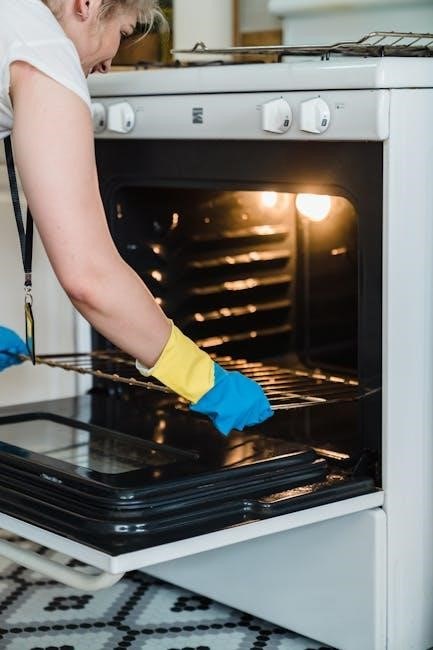
Removing Oven Racks‚ Broiler Pans‚ and Utensils
Before initiating the self-cleaning cycle‚ remove all oven racks‚ broiler pans‚ and utensils․ This prevents damage from high temperatures and ensures effective cleaning․ Place items in a safe location to avoid accidental exposure to heat․ Do not leave any metal parts inside‚ as they may discolor or warp during the cycle․ Additionally‚ clean these items separately with hot‚ soapy water and a soft sponge to maintain their condition․ Always refer to Viking’s guidelines for specific instructions tailored to your model to ensure proper preparation and safety․
Cleaning the Stainless Steel Exterior Before and After Use
Regular cleaning of the stainless steel exterior is essential to maintain its appearance and durability․ Before using the self-clean feature‚ wipe down the exterior with a soft‚ damp microfiber cloth to remove fingerprints and splatters․ For tougher stains‚ use a mild soap solution‚ but avoid abrasive cleaners or scrubbers‚ as they may scratch the surface․ After the self-cleaning cycle‚ wipe the exterior again to remove any residue or dust․ For polished finishes‚ apply a stainless steel cleaner and buff in the direction of the grain for a sleek look․ Regular maintenance ensures the exterior remains pristine and resistant to smudges․
Activating the Self-Clean Mode
Select the self-clean mode on your Viking oven by turning the designated knob to the “Clean” setting․ Choose the desired temperature‚ lock the door‚ and set the timer to initiate the cycle․
Step-by-Step Instructions for Initiating the Cycle
To activate the self-clean mode on your Viking oven‚ start by ensuring all racks and utensils are removed․ Turn the self-clean knob to the “Clean” setting and select the desired temperature using the control panel․ Next‚ confirm the oven door is fully closed and locked to ensure safety during the high-heat cycle․ Set the timer according to the recommended duration‚ typically 3-4 hours‚ depending on soil level․ Once the cycle starts‚ the oven will heat to a high temperature to burn off food residue․ After completion‚ allow the oven to cool before opening the door․ The cycle will automatically unlock once cooled‚ leaving the interior clean and ready for use․
Understanding the Cleaning Process and Duration
The Viking self-cleaning process uses high heat to break down food residue into ash․ This cycle typically lasts 3-4 hours‚ depending on the oven’s condition․ During operation‚ the oven door locks automatically to ensure safety․ After the cycle completes‚ let the oven cool before opening․ The process is chemical-free‚ making it eco-friendly․ Once cooled‚ wipe away ash with a damp cloth․ Regular use of this feature maintains oven efficiency and hygiene․ Always follow manufacturer guidelines to ensure optimal results and appliance longevity․
Troubleshooting Common Issues
Common issues include self-clean failure to activate or error codes․ Resetting the oven by turning off the breaker for 60 seconds often resolves these problems effectively․
Resolving Issues When the Self-Clean Feature Fails to Activate
If the self-clean feature fails to activate‚ check the oven controls and ensure they are set correctly․ Verify that the oven door is completely closed and latched․ If issues persist‚ reset the oven by turning off the circuit breaker for 60 seconds․ After resetting‚ attempt to initiate the self-clean cycle again․ If the problem continues‚ consult the user manual or contact Viking customer support for assistance․ Always ensure the oven is cool before troubleshooting to avoid any safety risks․ Proper maintenance and regular checks can prevent such issues from arising․
Addressing Error Codes and Resetting the Oven
If your Viking oven displays error codes during the self-clean cycle‚ refer to the user manual for specific code meanings․ Common solutions include resetting the oven by switching off the power at the circuit breaker for 60 seconds․ After resetting‚ restart the self-clean process․ If the error persists‚ ensure all controls are properly set and the door is securely closed․ In some cases‚ professional assistance may be required․ Regularly checking and maintaining the oven’s components can help prevent errors and ensure smooth operation during self-cleaning cycles․
Maintenance and Care After Self-Cleaning
Post self-cleaning‚ clean up residue with a damp cloth․ Wipe down the oven interior and exterior regularly to maintain a pristine condition and ensure optimal performance over time․
Cleaning Up Residue Post-Cycle

After the self-cleaning cycle‚ allow the oven to cool completely․ Use a damp cloth or sponge to wipe away ash and residue․ Avoid using abrasive cleaners or harsh chemicals‚ as they may damage the finish․ For tougher residue‚ a mixture of baking soda and water can be applied‚ but ensure it’s rinsed thoroughly․ Never use metal scrapers or scouring pads‚ as they can scratch the surfaces․ Regular cleaning prevents residue buildup and maintains the oven’s efficiency․ Always refer to Viking’s guidelines for approved cleaning products to preserve your oven’s longevity and performance․
Wipe Down the Oven Interior and Exterior
After the self-cleaning cycle‚ inspect the oven interior for any remaining residue․ Use a soft‚ damp cloth to gently wipe down the interior surfaces‚ focusing on areas with visible ash or debris․ For the exterior‚ including the door and knobs‚ use a mild soap solution and a microfiber cloth to maintain the stainless steel finish․ Avoid harsh chemicals or abrasive materials‚ as they can damage the surfaces․ Regular wiping prevents grime buildup and keeps the oven looking pristine․ Ensure all surfaces are dry to prevent water spots․ This routine maintenance ensures your Viking oven remains both functional and visually appealing for years to come․