The Step 2 Big Climber with Slide is a durable, kid-friendly playset designed for outdoor fun․ It combines climbing, sliding, and imaginative play, promoting physical activity and creativity․ With sturdy construction and safety features, it’s perfect for backyard adventures, fostering developmental skills while ensuring a secure environment for children to explore and enjoy․
Overview of the Product
The Step 2 Big Climber with Slide is a versatile and interactive playset designed for children, combining a sturdy climbing structure with an exciting slide․ Made from high-quality, weather-resistant materials, it is ideal for outdoor use and promotes physical activity, creativity, and imaginative play․ The product features a large climbing wall, a smooth slide, and additional interactive elements, making it a great addition to any backyard․ Designed for safety and durability, it is constructed to withstand frequent use and varying weather conditions․ Parents and caregivers will appreciate its easy-to-follow assembly instructions, ensuring a hassle-free setup; The Step 2 Big Climber with Slide is perfect for fostering developmental skills while providing endless fun for kids of various ages․
Importance of Following Assembly Instructions
Adhering to the assembly instructions for the Step 2 Big Climber with Slide is crucial for ensuring safety, stability, and proper functionality․ Following the guide helps prevent structural issues, such as uneven bases or loose connections, which could lead to accidents․ Clear step-by-step directions ensure that all parts are correctly aligned and secured, minimizing the risk of hardware failure․ Additionally, assembly instructions often include safety precautions, like anchoring the climber to the ground, to prevent tipping and ensure a stable play environment․ By carefully following the instructions, you can avoid common mistakes, save time, and ensure the product lasts for years of enjoyable use․ Proper assembly also guarantees that safety features, like railings and supports, are correctly installed, providing peace of mind for parents and caregivers․

Pre-Assembly Preparation
Gather all tools and materials, organize parts, and prepare a clean, flat workspace․ Ensure safety by clearing the area of obstacles and having a helper for larger components․
Tools and Materials Needed for Assembly
To successfully assemble the Step 2 Big Climber with Slide, you’ll need a few essential tools and materials․ Start with a screwdriver set, including both Phillips and flathead options, as different screws may require specific drivers․ An Allen wrench is also necessary for securing bolts․ Ensure you have a rubber mallet for gently tapping parts into place without damaging them․ Safety glasses and gloves are recommended to protect yourself during the process․ Additionally, gather all the hardware provided in the kit, such as screws, bolts, and washers, and organize them by size and type․ Double-check the inventory list to confirm all parts are included before starting․ Finally, having a helper can be beneficial for stabilizing larger components during assembly․ Organize your workspace neatly to avoid losing small pieces and ensure a smooth process․
Workspace Setup and Safety Measures
Before starting the assembly of the Step 2 Big Climber with Slide, ensure your workspace is clean, flat, and dry․ Choose a spacious area, such as a garage or driveway, to accommodate the large components․ Cover the floor with a drop cloth or old sheets to protect it from potential damage․ Organize all tools and materials in labeled trays or bags to avoid losing small parts․ Safety is paramount, so wear gloves and safety glasses to prevent injuries․ Keep children and pets away from the assembly area to minimize distractions․ Double-check that all parts are included and undamaged before beginning․ Consider having a second person assist with heavier pieces to ensure stability and prevent accidents․ Finally, make sure all instructions are within easy reach, and review them briefly to anticipate any complex steps․ A well-prepared workspace ensures a smooth and safe assembly process․
Step-by-Step Assembly Guide
Follow detailed instructions to build the Step 2 Big Climber with Slide, starting with the base, then attaching the climbing wall, and finally installing the slide securely․
Assembling the Base Structure
Begin by gathering all necessary tools and hardware․ Lay out the base components on a flat, stable surface․ Attach the legs to the base frame using the provided bolts, ensuring they are evenly spaced and securely tightened․ Next, align the crossbeams with the pre-drilled holes and screw them into place․ Use a rubber mallet to tap pieces together gently․ Double-check that all connections are tight and the base is level․ Follow the manufacturer’s instructions for torque specifications to avoid over-tightening․ Once the base is fully assembled, proceed to attach the climbing wall and slide components․ Always refer to the step-by-step guide for precise alignment and safety measures․
Attaching the Climbing Wall
Once the base structure is secure, align the climbing wall panels with the designated attachment points․ Use the provided bolts to fasten the panels to the base, ensuring a snug fit․ Tighten all bolts firmly but avoid over-tightening, which could damage the material․ Next, attach the handholds and footholds according to the assembly guide, making sure they are evenly spaced and securely fastened․ Double-check the alignment of the climbing wall with the slide and base to ensure proper integration․ Use a level to confirm the wall is straight and stable․ Finally, tighten all connections one last time to ensure the climbing wall is sturdy and ready for use․ Always refer to the step-by-step instructions for precise bolt placement and torque specifications․
Installing the Slide
Securing Safety Features
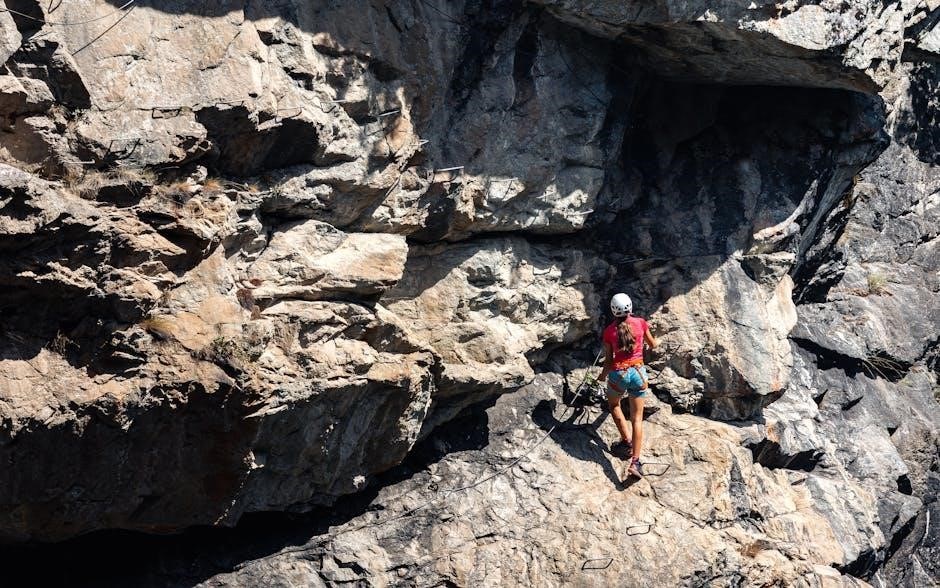
To ensure the Step 2 Big Climber with Slide is safe for children, start by installing stake anchors at a 90-degree angle to the ground, as shown in the assembly guide․ These anchors provide stability and prevent the structure from tipping over․ Next, attach the safety enclosure, such as railings or nets, around the climbing area to prevent falls․ Ensure all bolts and screws are tightened securely to avoid loose parts․ Install soft ground cover, like wood chips or rubber mulch, around the base to provide a cushion in case of tumbles․ Double-check all safety features, such as ladder rungs and slide supports, to ensure they are properly secured․ Finally, conduct a thorough inspection of the entire structure before allowing children to play․ Regular maintenance and inspections are essential to maintain safety standards over time․

Tips and Tricks for Smooth Assembly
Organize all parts before starting, use the correct screwdriver size, and follow step-by-step instructions carefully․ This ensures efficient assembly and minimizes potential errors or delays․
Organizing Parts Before Starting
Organizing parts before starting the assembly of the Step 2 Big Climber with Slide is essential for a smooth and efficient process․ Begin by carefully unpacking all components and sorting them into categories, such as hardware, structural pieces, and accessories․ Use the inventory list provided in the manual to ensure no parts are missing․ Cross-reference each item with the instructions to understand its purpose․ Designate a clean, flat workspace and arrange the parts in a logical order, grouping similar items together․ Labeling or separating hardware like screws, bolts, and washers into small containers can prevent mix-ups․ Finally, review the assembly manual to familiarize yourself with the sequence of steps and required tools․ A well-organized setup minimizes delays and frustration, ensuring a stress-free assembly experience․
Using the Correct Screwdriver
Using the correct screwdriver is crucial for a successful assembly of the Step 2 Big Climber with Slide․ Start by identifying the screwdriver type recommended in the instructions, as using the wrong one can damage screws or strip heads․ Most assemblies require a Phillips-head screwdriver, but verify this beforehand․ Ensure the screwdriver is in good condition, with a firm handle and a sharp tip to prevent slippage․ For powered screwdrivers, set the torque appropriately to avoid over-tightening, which could harm the material․ If using a manual screwdriver, maintain a steady hand and apply consistent pressure․ Keep the screwdriver within easy reach to streamline the process․ Double-checking screw sizes before driving ensures a secure fit and prevents costly mistakes․ Proper screwdriver use not only saves time but also guarantees a sturdy and safe final product for years of enjoyment․
Avoiding Common Mistakes
To ensure a smooth assembly process for the Step 2 Big Climber with Slide, it’s essential to avoid common mistakes․ First, always double-check the parts against the inventory list to confirm everything is included․ Misplacing screws or bolts early on can lead to delays․ Next, avoid tightening screws prematurely; assemble components loosely and secure them only when alignment is confirmed․ Over-tightening can damage the material or strip screw heads․ Pay close attention to the orientation of parts, as incorrect placement can affect stability․ Finally, refrain from skipping steps or deviating from the instructions, as this can result in structural issues․ Taking your time and following the guide carefully will help you avoid costly errors and ensure a sturdy, safe final product․

Incorporating Additional Features
Enhance your Step 2 Big Climber with Slide by adding swing attachments or installing ground cover for improved safety and play value, creating a versatile outdoor play solution․
Adding Swing Attachments
Adding swing attachments to your Step 2 Big Climber with Slide can expand its play potential, offering kids more ways to enjoy the outdoors․ Swings encourage social interaction and imaginative play while providing a fun way to develop balance and coordination․ To install swing attachments, ensure you have the correct hardware, such as sturdy chains and swing seats, which may be purchased separately or included in accessory kits․ Follow the manufacturer’s guidelines for weight limits and installation procedures to ensure safety․ Properly securing the swings to the structure is crucial to prevent accidents․ Additionally, consider the height and spacing to accommodate multiple children playing simultaneously․ This feature transforms the climber into a versatile playset, catering to a variety of ages and abilities, making it a focal point for neighborhood fun and activity․
Installing Ground Cover
Installing ground cover around the Step 2 Big Climber with Slide is essential for ensuring a safe and durable play area․ Recommended materials include rubber mulch, wood chips, or poured-in-place rubber surfacing, as these options provide shock absorption and traction․ Begin by marking the area around the climber, ensuring coverage extends at least 6 feet in all directions․ Clear the space of debris and level the ground to create a stable surface․ Lay the chosen material to the recommended depth, typically 4-6 inches for rubber mulch or wood chips․ Secure the edges with border material to prevent shifting․ Regularly inspect and replenish the ground cover to maintain its protective qualities․ Proper installation not only enhances safety but also extends the lifespan of the playset by reducing wear and tear․ This step is crucial for creating a secure environment for children to play and explore․

Safety Guidelines and Precautions
Ensure the climber is placed on level ground and secured with stake anchors for stability․ Adult supervision is recommended during play to prevent accidents and injuries․
Ensuring Stability with Stake Anchors
Stake anchors are crucial for securing the Step 2 Big Climber with Slide, preventing it from tipping over․ Proper installation involves inserting the anchors at a 90-degree angle into the ground, ensuring they are tightly fitted to the base․ This step ensures the structure remains stable, providing a safe environment for children to play․ Always follow the manufacturer’s instructions for anchor placement to maximize stability․ Regularly inspect the anchors to ensure they remain securely in place, especially after heavy use or extreme weather conditions․ A stable setup guarantees a safer and more enjoyable experience for kids․
Supervising Children During Play
Adult supervision is essential to ensure safe and enjoyable play on the Step 2 Big Climber with Slide․ Always monitor children to prevent accidents and teach them proper usage․ Encourage kids to climb and slide one at a time to avoid overcrowding․ Step in if you notice unsafe behavior, such as climbing outside designated areas or pushing others․ Demonstrate how to use the equipment correctly, like facing forward when sliding and holding onto handrails while climbing․ Supervision also helps identify potential hazards, such as loose clothing or jewelry that could get caught․ By being actively involved, you create a safer environment for children to explore and play, aligning with the manufacturer’s guidelines for safe and responsible use․

Maintenance and Upkeep
Regular cleaning and inspections are crucial for maintaining the Step 2 Big Climber with Slide․ Remove dirt, check for wear, and address any damage promptly․ Protect from harsh weather conditions to ensure longevity․
Cleaning the Climber and Slide

Regular cleaning is essential to maintain the Step 2 Big Climber with Slide․ Use a mild detergent and water to wipe down surfaces, removing dirt and grime․ Avoid abrasive materials or harsh chemicals, as they may damage the finish․ Rinse thoroughly with clean water to remove soap residue․ For tough stains, a soft-bristle brush can gently scrub the area․ Allow the climber to air dry completely to prevent water spots․ Regularly inspect and clean any small crevices or joints where debris might accumulate․ This maintenance ensures the playset remains safe, durable, and visually appealing for years of outdoor fun․ Always follow the manufacturer’s cleaning recommendations to preserve the product’s integrity and longevity․
Inspecting for Wear and Tear
Regular inspections are crucial to ensure the longevity and safety of the Step 2 Big Climber with Slide․ Begin by examining the joints and connections for any signs of loosening or damage․ Check the bolts and screws for rust or wear, as these can compromise the structure’s stability over time․ Inspect the climbing surfaces and slide for cracks, fading, or splintering, especially in areas exposed to sunlight or heavy use․ Look for any sharp edges or protrusions that may have developed due to wear․ Additionally, monitor the ground anchors to ensure they remain securely in place․ Address any issues promptly by tightening loose parts, replacing damaged components, or recoating surfaces as needed․ Regular inspections help prevent potential hazards and keep the playset safe and enjoyable for children․ This proactive approach ensures the climber and slide remain durable and reliable for years of outdoor play․

Customer Reviews and Feedback
Customers praise the Step 2 Big Climber with Slide for its durability and fun design․ Many highlight easy assembly and its ability to keep kids entertained for hours․
Positive Experiences with Assembly
Many customers have shared positive experiences with assembling the Step 2 Big Climber with Slide․ Parents and caregivers often highlight the clarity of the instructions, which make the process straightforward․ The step-by-step guide ensures that even those with limited DIY experience can complete the assembly efficiently․ Several reviewers mentioned that the parts are well-labeled and fit together seamlessly, reducing confusion․ The assembly process is described as manageable, with most completing it in a few hours․ Additionally, the sturdy design and safety features of the product have been praised, giving parents peace of mind․ Overall, the assembly experience is frequently described as smooth and rewarding, resulting in a durable and enjoyable playset for children․

Common Challenges and Solutions
Some users have reported challenges during the assembly of the Step 2 Big Climber with Slide, primarily related to missing parts or unclear instructions․ To address this, it’s essential to thoroughly check all components before starting and cross-reference them with the provided inventory list․ If any parts are missing, contact customer support promptly for a resolution․ Additionally, a few users found certain steps, such as aligning the slide or securing the climbing wall, to be tricky․ To overcome this, carefully follow the step-by-step guide and consider enlisting a second pair of hands for stability․ For added clarity, refer to the official assembly videos or online tutorials, which often provide visual guidance․ By staying organized and patient, most issues can be resolved smoothly, ensuring a successful and stress-free assembly process․