Welcome to the Panasonic Bread Maker Manual, your comprehensive guide to mastering bread making. This manual covers essential features, recipes, and troubleshooting for optimal bread-making experiences.
1.1 Overview of Panasonic Bread Maker Models
Panasonic offers a range of bread maker models, including the SD-YD250, SD-BT56P, SD-250, and SD-R2530, each designed for ease of use and high-quality bread making; These models feature automatic operation, various bread programs, dough options, and accessories like measuring spoons. They cater to both beginners and experienced bakers, providing consistent results and versatility in recipe customization.
1.2 Importance of Reading the Manual
Reading the Panasonic Bread Maker manual is crucial for understanding safety guidelines, optimal usage, and troubleshooting. It ensures proper operation, prevents potential damage, and helps users achieve consistent baking results. The manual provides detailed instructions, ingredient measurements, and maintenance tips, enabling users to maximize their bread maker’s potential and explore various recipes effectively.
Operating Instructions and Basic Functions
This section provides a detailed guide to operating your Panasonic Bread Maker, covering basic functions, control panel navigation, and essential steps for smooth bread-making experiences.
2.1 Understanding the Control Panel
The control panel features an intuitive interface with buttons for selecting modes like BASIC, WHOLE WHEAT, and MULTIGRAIN. Use the MENU button to choose programs and adjust settings. The LCD display shows progress, while the START/STOP button controls operation. Adjust crust color with DARK/LIGHT options and set timers for delayed baking. Ensure you understand each function before use for optimal results. Refer to the manual for detailed button purposes and operation guidelines.
2.2 Basic Principles of Bread Making
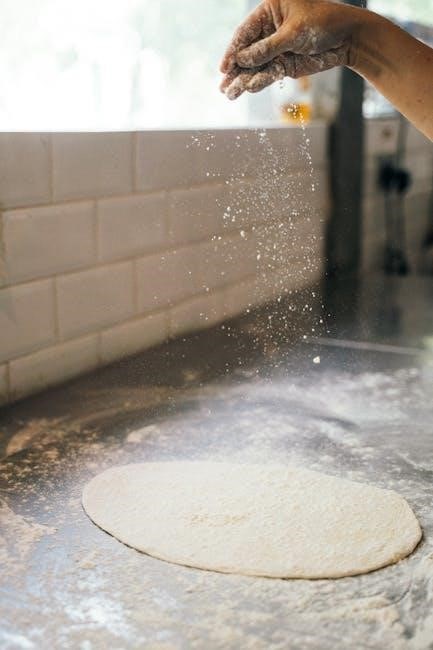
Bread making involves mixing, kneading, rising, and baking. The Panasonic bread maker automates these steps, ensuring consistent results. Key ingredients include flour, yeast, water, salt, and sugar. Yeast ferments sugars, producing carbon dioxide for dough rise. Strong flours are ideal for bread making. Precise measurements and temperature control are crucial for optimal results. The machine’s programs adapt to ingredient ratios, ensuring perfect loaves every time.
2.3 Step-by-Step Usage Guide
Start by removing the bread pan and attaching the kneading blade. Add ingredients except yeast and liquids into the pan. Select your desired program and settings, such as loaf size and crust color. Pour liquids and add yeast through the dispenser. Close the lid, press Start, and let the machine handle mixing, kneading, rising, and baking. Once complete, remove the bread pan with oven gloves and let the loaf cool before slicing.
Baking Programs and Options
Panasonic bread makers offer versatile baking programs like Basic, Whole Wheat, and Multigrain. Special features include Rapid Bake, Dough, and Timer functions for customized crust settings and delayed baking.
3.1 Types of Bread Programs (Basic, Whole Wheat, Multigrain)
Panasonic bread makers feature diverse programs for different bread types. The Basic program is ideal for traditional white bread using strong flour. The Whole Wheat program accommodates denser loaves with whole wheat flour. The Multigrain option blends various grains for a nutritious and textured result. Each program adjusts kneading, rising, and baking times to ensure perfect texture and flavor, catering to various preferences and dietary needs.
3.2 Special Features (Rapid Bake, Dough Option)
Panasonic bread makers offer convenient special features like Rapid Bake, which reduces baking time by up to 1 hour, perfect for quick results. The Dough option allows you to prepare pizza, pasta, or bread dough without baking, giving you flexibility. These features enhance versatility, enabling users to create a variety of breads and doughs efficiently, catering to different needs and preferences for homemade baking convenience.
3.3 Using the Timer Function
The timer function on Panasonic bread makers allows you to delay baking, ensuring fresh bread when you want it. Simply add ingredients, set the timer up to 13 hours in advance, and the machine will start baking automatically. This feature is ideal for busy schedules, letting you wake up to freshly baked bread or have dough ready for later use, offering convenience and flexibility for homemade bread enthusiasts. Always refer to manual for specific instructions.
Ingredients and Measurements
This section covers essential ingredients and measurements for bread making. Key components include flour, yeast, salt, sugar, and liquids. Accurate measurements are crucial for best results. Use the provided measuring spoon for precise quantities to ensure consistent bread quality every time.
4.1 Essential Ingredients for Bread Making
The basic ingredients for bread making include high-protein flour, salt, sugar, and active dry yeast. Flour provides structure, while salt enhances flavor and yeast ensures rise. Sugar feeds yeast for fermentation. Liquid ingredients like water or milk add moisture; Optional additions include butter, oils, or herbs for flavor. Always use fresh yeast for best results. Measure ingredients precisely to ensure consistent bread quality and texture.
4.2 Role of Yeast, Flour, and Other Ingredients
Yeast is the leavening agent, enabling dough to rise by producing carbon dioxide. Flour, typically bread or all-purpose, forms the dough’s structure. Salt enhances flavor and controls yeast activity, while sugar feeds yeast for fermentation. Optional ingredients like butter or oil add moisture and flavor. Proper hydration and balance of these components ensure optimal bread texture and rise. Understanding their roles is key to achieving perfect loaves in your Panasonic bread maker.
4.3 Measuring Techniques for Consistent Results
Accurate measurements are crucial for consistent bread-making results. Use a digital scale for precise flour and yeast quantities, as volume measurements can vary. Level ingredients when using cups to avoid overpacking. Liquids should be measured at room temperature for optimal yeast activation. Sift flour if specified to ensure even distribution. Proper measurement ensures balanced flavors, correct rise, and a perfect crumb, making your Panasonic bread maker recipes reliable and delicious every time.
Recipes and Customization
Explore a variety of recipes, from classic white bread to whole wheat, multigrain, and specialized options like raisin and French. Customize ingredients and settings for personalized results, ensuring each loaf meets your taste preferences with guidance from the Panasonic manual.
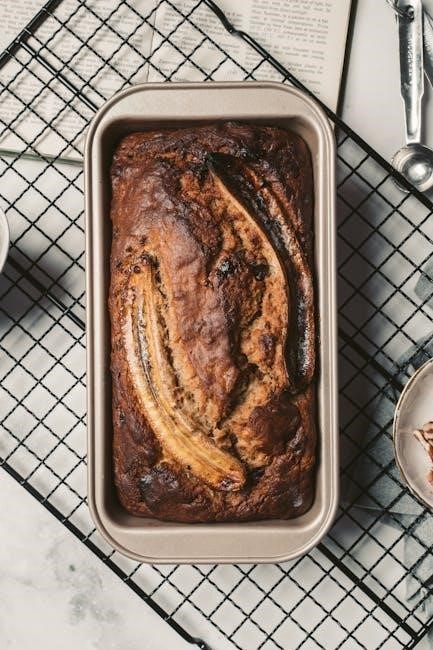
5.1 Basic White Bread Recipe
The Panasonic manual provides a simple recipe for classic white bread. Ingredients include bread flour, salt, dry milk, butter, sugar, water, and dry yeast. Add ingredients to the bread pan, select the Basic mode, and choose your preferred loaf size and crust color. The machine handles mixing, kneading, and baking. Let the bread cool before slicing for the best texture and flavor. Perfect for beginners, this recipe ensures a delicious, homemade loaf every time.
5.2 Whole Wheat and Multigrain Recipes
The Panasonic manual offers wholesome whole wheat and multigrain recipes for a healthier option. Whole wheat recipes use whole wheat flour, salt, dry milk, butter, molasses, water, and dry yeast. Multigrain recipes blend various grains for added texture and nutrition. Both recipes are baked using the Whole Wheat or Multigrain mode. For raisin variations, adjust water measurements to ensure dough consistency. Perfect for those seeking nuttier, earthier bread flavors with added fiber and nutrients.
5.3 Specialized Recipes (Raisin, French, Pizza Dough)
Explore Panasonic’s specialized recipes for raisin, French, and pizza dough. Raisin bread adds sweetness with dried fruits, French bread offers a crusty texture, and pizza dough allows homemade convenience. The manual guides these recipes with precise measurements and settings. For raisin bread, adjust water for dough softness. French bread uses a simple dough, while pizza dough is ready in hours. Perfect for variety and creativity in your bread-making journey.
Maintenance and Cleaning
Regular cleaning ensures optimal performance. Remove the bread pan and wash it with mild soap. Wipe the exterior with a damp cloth. Store the bread maker and accessories properly to maintain hygiene and longevity.
6.1 Cleaning the Bread Pan and Exterior
Regularly clean the bread pan and exterior to maintain your Panasonic bread maker’s performance. Remove the bread pan and wash it with mild soap and warm water. Avoid abrasive cleaners to prevent scratching. Gently wipe the exterior with a damp cloth, ensuring no moisture enters the appliance. Dry thoroughly to prevent rust or electrical issues. Cleaning after each use prevents dough residue buildup and ensures consistent baking results. Always unplug the unit before cleaning for safety.
6.2 Storing the Bread Maker and Accessories
Store your Panasonic bread maker in a cool, dry place, away from direct sunlight and moisture. After cleaning, ensure all parts are completely dry before storing. Use the original packaging or a protective cover to prevent dust accumulation. Accessories like measuring cups and kneading blades should be stored in airtight containers to maintain hygiene and organization. Proper storage ensures longevity and optimal performance of your bread maker and its components.
Troubleshooting Common Issues
Identify common issues like collapsed bread or under-baked loaves by checking yeast activation, ingredient measurements, and program settings. Ensure the kneader shaft rotates properly and avoid power interruptions during operation for consistent results.
7.1 Identifying and Resolving Baking Problems
Common baking issues include collapsed bread, under-baked loaves, or uneven slicing. Check yeast activation, ensure accurate measurements, and verify program settings. If bread sticks, lightly oil the pan. For dense bread, adjust flour quantity. Power interruptions or improper ingredient ratios can cause issues. Refer to the troubleshooting guide for specific solutions and ensure the kneader shaft rotates smoothly for optimal results every time.
7.2 Understanding Error Indications and Solutions
Identify error codes or unusual behavior in your Panasonic bread maker. Common issues include the kneader shaft not rotating or uneven baking. Check power connections and ingredient measurements. If the bread pan sticks, lightly oil it. For error codes, consult the manual or contact support. Regular cleaning and proper maintenance can prevent many issues. Always refer to the troubleshooting guide for specific solutions to ensure optimal performance and delicious results every time.
Accessories and Additional Features
Your Panasonic bread maker comes with essential accessories like a measuring spoon and cup. Optional extras include a yeast dispenser and recipe book for enhanced baking experiences.
8.1 Overview of Included Accessories
Your Panasonic bread maker comes with a range of included accessories to enhance your baking experience. These typically include a durable bread pan with a non-stick coating, a kneading blade for mixing dough, and a measuring spoon and cup for precise ingredient measurements. Some models also include a recipe book with step-by-step instructions and ideas for various bread types. These accessories ensure you have everything needed to start baking delicious homemade bread right away.
8.2 Optional Accessories for Enhanced Use
Optional accessories can elevate your bread-making experience. These may include additional bread pans, specialized kneading blades, or a yeast dispenser for precise ingredient handling. Some models offer a delay timer or rapid bake option for added convenience. Non-stick pans and cool-touch exteriors are also available for easier cleaning and safety. These extras can be purchased separately to enhance functionality and customization, allowing you to explore more recipes and baking techniques with your Panasonic bread maker.

Safety Precautions and Warranties
This section outlines essential safety precautions to prevent accidents and details warranty information for repairs and replacements. Refer to the manual for complete coverage details.
9.1 Important Safety Guidelines
Always unplug the bread maker before cleaning and avoid using damaged cords. Keep children away and never insert metal objects. Ensure proper ventilation to prevent overheating. Avoid placing the appliance near water sources to prevent electrical hazards. Follow recipe guidelines to maintain balance and prevent machine overload. Regularly inspect parts for wear and tear. Refer to the manual for detailed safety measures to ensure safe operation and longevity of your Panasonic bread maker.
9.2 Warranty Information and Service Centers
Your Panasonic bread maker is backed by a limited warranty covering manufacturing defects. Register your product for extended support. For repairs, contact authorized service centers or call 1-800-211-PANA. Warranty periods vary by region; check your manual for details. Genuine parts and professional service ensure optimal performance. Keep your manual and proof of purchase for warranty claims. Visit Panasonic’s official website for service center locations and additional support resources.
Mastering your Panasonic bread maker unlocks endless baking possibilities. Experiment with recipes, explore new flavors, and maintain your machine for lasting performance. Happy baking!
10.1 Maximizing Your Bread Maker’s Potential
To maximize your Panasonic bread maker’s potential, explore its various programs and settings. Regularly clean and maintain the machine for optimal performance. Experiment with different ingredients and recipes to create unique bread varieties. Utilize the timer function for convenience and ensure accurate measurements for consistent results. By following these tips, you can unlock your bread maker’s full capabilities and enjoy perfect homemade bread every time.
10.2 Encouragement to Experiment and Explore
Don’t hesitate to explore beyond basic recipes! Try experimenting with different ingredients like herbs, nuts, or seeds to create unique flavors. Adjust settings to tailor bread texture and crust color to your preference. Remember, practice makes perfect—test new recipes and techniques to refine your skills. Share your creations and enjoy the satisfaction of homemade bread tailored to your taste. Happy baking!