drill tap guide

A drill tap guide is a versatile tool designed to enhance precision and consistency in machining and woodworking projects. It provides a stable platform for accurate hole drilling and thread tapping‚ ensuring professional results every time.

By streamlining the drilling and tapping process‚ it reduces errors and saves time‚ making it an essential tool for both professionals and DIY enthusiasts alike. Versatility and ease of use make it a must-have for any workshop.

Overview of Drill Tap Guide

A drill tap guide is a specialized tool designed to assist in precise drilling and tapping operations. It ensures accurate alignment between drill bits and taps‚ minimizing errors and improving workflow efficiency. Whether for machining metals or woodworking‚ this guide stabilizes the tools‚ preventing misalignment and vibration. Its robust construction and adjustable features make it adaptable to various projects‚ ensuring consistent results.

Key features often include precise alignment mechanisms‚ durable materials‚ and compatibility with different drill bits and taps. This tool is invaluable for professionals and hobbyists‚ offering a reliable solution for creating threaded holes efficiently. Its versatility and ease of use make it a cornerstone in many workshops‚ enhancing both productivity and precision.

Importance of Drill Tap Guide in Machining and Woodworking

The drill tap guide plays a crucial role in ensuring precision and consistency in both machining and woodworking. By providing a stable platform for drilling and tapping‚ it helps create accurate threaded holes‚ which are essential for secure fastening. This tool minimizes errors‚ such as misaligned holes or damaged threads‚ which can lead to costly rework or material waste. In woodworking‚ it enhances the quality of joints and fittings‚ while in machining‚ it ensures the integrity of mechanical components. Its ability to streamline the process saves time and increases productivity‚ making it indispensable for professionals and hobbyists alike. Precision and efficiency are key to achieving professional results‚ and the drill tap guide delivers both.

Additionally‚ the guide reduces the risk of tool damage and prolongs the lifespan of drill bits and taps. Its versatility allows it to work with various materials‚ including metals‚ wood‚ and plastics‚ making it a valuable asset for diverse projects. By eliminating guesswork and ensuring uniform results‚ the drill tap guide elevates the quality of craftsmanship in both industries. Its importance lies in its ability to simplify complex tasks while maintaining high standards of accuracy and reliability; This makes it a must-have tool for anyone seeking to achieve professional-grade outcomes in machining and woodworking.

Choosing the Right Tools for Drilling and Tapping

Selecting the right tools is crucial for efficient and precise drilling and tapping. Ensure compatibility with your material and project requirements to achieve optimal results and longevity.

Selecting the Correct Drill Bits and Taps

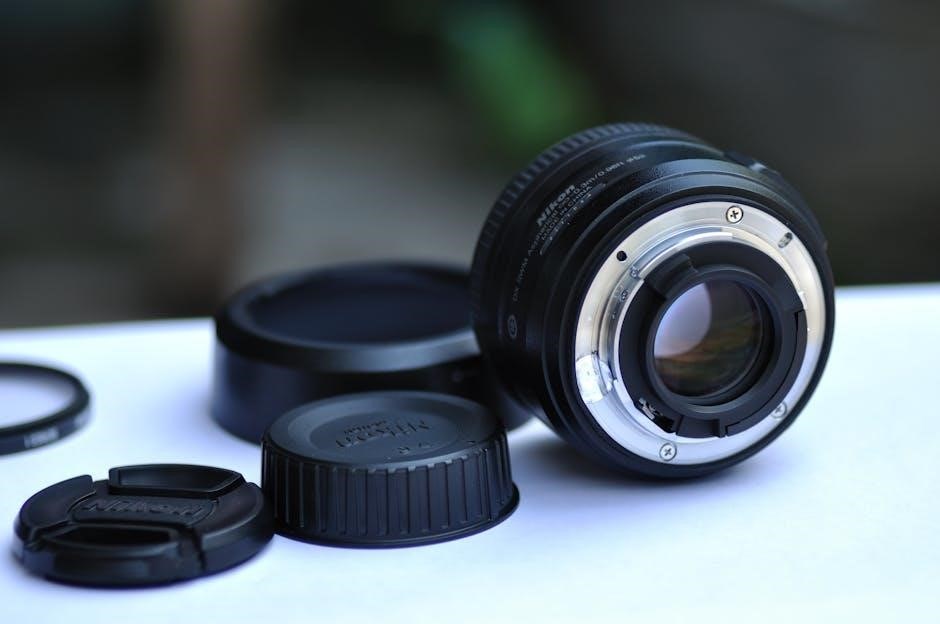
Selecting the correct drill bits and taps is essential for achieving precise and professional results in drilling and tapping operations. The choice of tools depends on the material being worked on‚ such as metal‚ wood‚ or plastic‚ as well as the desired hole size and type. Drill bits vary in diameter‚ flute count‚ and coating‚ while taps differ in pitch‚ thread type‚ and size. Always ensure the drill bit matches the tap size to create proper threads. High-quality tools with appropriate coatings‚ like titanium nitride or carbide‚ enhance durability and performance. Proper selection prevents damage to the workpiece and tools‚ ensuring smooth and accurate operations.

Understanding Drill Bit and Tap Sizes‚ Materials‚ and Coatings

Drill bit and tap sizes are critical for precise hole drilling and threading. Bits are measured by diameter‚ while taps are categorized by pitch and thread type. Materials like high-speed steel (HSS)‚ carbide‚ and titanium nitride offer varying levels of durability and wear resistance. Coatings‚ such as titanium nitride‚ enhance tool life by reducing friction and preventing overheating. For woodworking‚ spade or forstner bits are ideal‚ while metalworking often requires twist or stub drills. Taps are available in different flavors‚ such as hand taps or machine taps‚ each suited for specific applications. Proper material and coating selection ensures optimal performance and longevity of tools. Always match tool material to the workpiece for best results.

Key Features to Consider When Purchasing Drill Taps

When selecting drill taps‚ prioritize features like durability‚ precision‚ and compatibility. Look for high-quality materials‚ such as hardened steel or carbide‚ to ensure longevity. Consider the shank type‚ as a sturdy shank reduces breakage risk. Thread quality and pitch accuracy are crucial for smooth tapping. Check compatibility with various materials‚ including metal‚ wood‚ and plastic. Adjustable depth stops and coolant systems enhance control and prevent overheating. Ease of use and alignment features‚ like pilot pins‚ improve accuracy. Storage cases and ergonomic handles are practical additions. Ensure the tool aligns with your project’s specific needs for optimal performance and efficiency.

Step-by-Step Guide to Drilling and Tapping

A drill tap guide simplifies the process by ensuring precise alignment and consistent results. Start by preparing the workpiece‚ then drill pilot holes. Use the guide to maintain accurate depth and alignment during tapping. For manual tapping‚ apply steady pressure and maintain tool control. Power tapping offers speed but requires careful monitoring. Always follow safety guidelines and tool recommendations for optimal outcomes. This method ensures professional-quality results with minimal effort and maximum precision.

Preparing the Workpiece and Tools for Drilling and Tapping

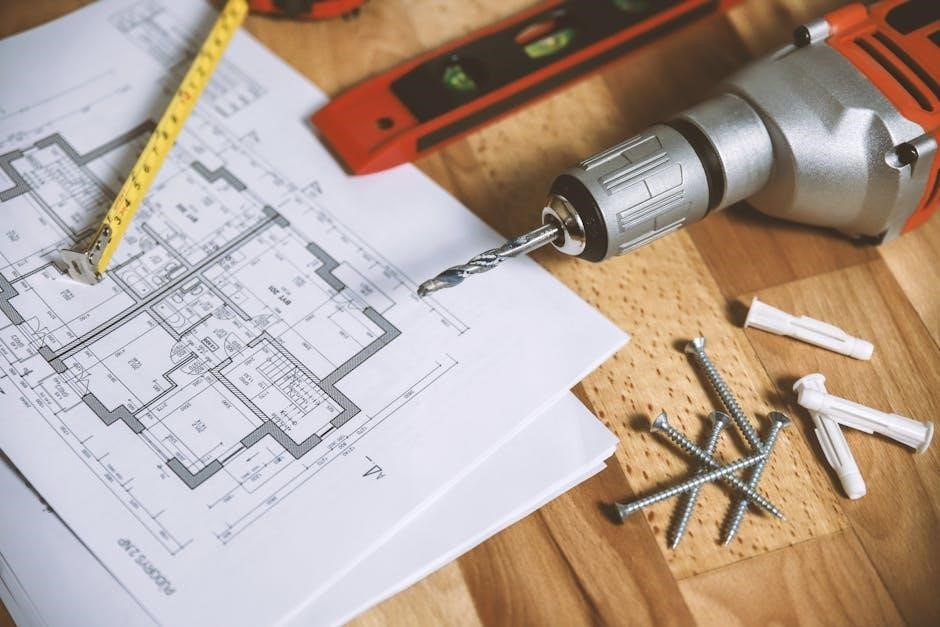
Before drilling and tapping‚ ensure the workpiece is clean and free from debris. Secure it firmly using clamps or a vise to prevent movement during operations. Inspect the drill bits and taps for sharpness and damage‚ as dull tools can lead to inaccurate results. Apply the appropriate lubricant or cutting oil to reduce friction and prevent overheating. Align the drill tap guide with the marked drilling location on the workpiece to ensure precise alignment. Double-check the tool settings and material specifications to avoid errors. Proper preparation ensures a smooth and efficient drilling and tapping process‚ minimizing the risk of damage to both the workpiece and tools.

Aligning the Drill Bit Properly for Accurate Drilling

Proper alignment of the drill bit is crucial for achieving precise and accurate results. Use the drill tap guide to ensure the bit is perfectly centered over the marked drilling location. Double-check the workpiece’s surface for any obstructions or unevenness‚ as this can affect alignment. Position the drill bit perpendicular to the workpiece to avoid angled holes. For added accuracy‚ use a center punch to create a small indentation at the drilling site‚ guiding the bit into place. Secure the workpiece firmly to prevent movement during drilling. Consider using a laser guide or alignment fence for enhanced precision‚ especially in complex projects.

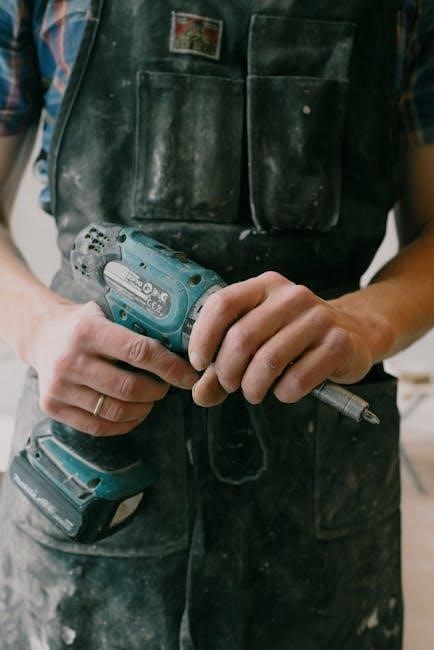
Tapping Process: Manual vs. Power Tapping Techniques

When it comes to tapping‚ the process can be performed manually or using power tools‚ each with its own advantages. Manual tapping offers precise control‚ making it ideal for small-scale projects or delicate materials. It involves using a tap wrench to turn the tap by hand‚ ensuring accuracy and avoiding over-tightening. Power tapping‚ on the other hand‚ is faster and more efficient‚ especially for large-scale operations. It uses drill presses or CNC machines to automate the process‚ reducing human error and increasing productivity. Both methods require proper alignment and consistent pressure to achieve clean‚ precise threads. Choosing the right technique depends on the project’s scope‚ material type‚ and desired outcomes.

Troubleshooting Common Issues in Drilling and Tapping

Common issues in drilling and tapping include misalignment‚ overheating‚ and tool damage. Misalignment can result in crooked holes or uneven threads‚ which can be avoided by using a drill tap guide for stability. Overheating occurs when tools are not properly lubricated or cooled‚ leading to premature wear. Applying cutting fluid or coolant can prevent this. Tool damage often stems from using the wrong tap or drill bit for the material or applying excessive force. Regular tool maintenance and following manufacturer guidelines can mitigate these problems. Addressing these issues ensures smoother operations and extends tool lifespan‚ resulting in higher quality finishes and reduced downtime.

Safety Tips and Best Practices

Always wear safety goggles‚ gloves‚ and proper attire to protect against debris and tool mishaps. Ensure a stable work environment and keep loose clothing tied back for safety.

Essential Safety Equipment for Drilling and Tapping

Safety goggles are crucial to protect eyes from flying debris. Gloves prevent cuts and improve grip‚ while a face mask reduces dust or chemical inhalation. Hearing protection is vital due to loud machinery noises.

Steel-toe shoes safeguard feet from heavy tools or falling objects. Proper work attire‚ including long sleeves and an apron‚ shields skin from sparks and debris. Always secure loose clothing or jewelry to avoid entanglement with tools.

A well-ventilated workspace prevents the buildup of harmful fumes. Ensure all equipment is in good condition‚ and avoid overreach to maintain balance and control during operations.

Preventing Overheating and Tool Damage

Preventing overheating and tool damage requires careful attention to drilling and tapping techniques. Using the correct drill bits and taps for the material ensures efficient cutting and minimizes heat buildup. Always maintain sharp tools‚ as dull edges generate excessive friction and heat.

Apply proper lubrication or coolant to reduce friction and prevent overheating. Avoid applying too much pressure‚ which can overheat tools and damage the workpiece. Regular tool maintenance‚ such as cleaning and sharpening‚ extends their lifespan and performance.

Ensure the workpiece is securely clamped to prevent movement‚ which can cause uneven wear and heat generation. Keep the workshop well-ventilated to dissipate heat effectively. Store tools in a dry‚ cool environment to avoid rust and degradation.

Working in a Stable and Well-Lit Environment

A stable and well-lit workspace is essential for precise drilling and tapping. Ensure your workbench is sturdy and level to prevent vibrations or wobbling during operations. Proper lighting illuminates the workpiece‚ allowing clear visibility of drill bits‚ taps‚ and material surfaces.

Adequate lighting helps identify small details‚ reducing errors and improving accuracy. Use overhead lights or task-specific lamps to maintain even illumination. A clutter-free workspace minimizes distractions and potential accidents‚ ensuring a safer and more efficient workflow.

Regularly clean the area to avoid dust or debris interfering with the process. A well-organized and brightly lit environment enhances focus and precision‚ leading to better results in drilling and tapping tasks.

A drill tap guide is an indispensable tool for achieving precision and efficiency in machining and woodworking. It empowers professionals and hobbyists to produce high-quality results consistently.

Using a drill tap guide offers numerous benefits‚ enhancing accuracy and efficiency in drilling and tapping operations. It ensures precise alignment‚ reducing errors and material waste. The tool promotes consistent results‚ making it ideal for both professionals and hobbyists. By streamlining the process‚ it saves time and effort‚ allowing for faster project completion. Additionally‚ a drill tap guide minimizes the risk of tool damage‚ extending the lifespan of drill bits and taps. Its versatility accommodates various materials and applications‚ providing a reliable solution for diverse projects. Overall‚ it is a cost-effective investment that elevates the quality and professionalism of machining and woodworking tasks.

Encouraging Practice and Skill Development in Drilling and Tapping

Regular practice is essential for mastering drilling and tapping techniques‚ and a drill tap guide is an excellent tool to facilitate skill development. By providing consistent results‚ it helps users build confidence and precision. Beginners can start with soft materials like aluminum or wood to refine their technique without risking damage to expensive tools. As skills improve‚ transitioning to harder materials becomes more manageable. Troubleshooting common issues during practice also enhances problem-solving abilities. Encourage experimenting with different drill bits and taps to understand their mechanics. With patience and consistent practice‚ users can achieve professional-level accuracy‚ making the drill tap guide a valuable aid in their learning journey.

Continue Reading

summary of the book of joshua pdf

The Book of Joshua narrates the Israelites’ conquest of Canaan under Joshua’s leadership, highlighting God’s faithfulness, the fulfillment of His promise, and the transition from Moses’ era, focusing on military strategies and divine intervention.

Background and Historical Context

The Book of Joshua is set in the late Bronze to early Iron Age, following the Israelites’ wilderness wanderings under Moses. It marks the transition from Moses’ leadership to Joshua, who guides the Israelites into Canaan, the Promised Land. This period is crucial as it fulfills God’s covenant with Abraham, promising land to his descendants. Historically, the book details the conquest of Canaan, emphasizing military campaigns and divine intervention. The Israelites’ entry into Canaan signifies a shift from nomadic life to settled existence. Key events include spies sent to Jericho, the miraculous crossing of the Jordan, and the fall of Jericho. These events highlight God’s faithfulness and the Israelites’ obedience, setting the stage for their establishment in the land. The text blends historical narrative with theological themes, showcasing God’s sovereignty and the Israelites’ identity as His people.

Joshua as the Successor of Moses

Joshua emerges as Moses’ chosen successor, entrusted with leading Israel into the Promised Land. His appointment is divinely ordained, as God commissions him to fulfill the covenant promise. Unlike Moses, who led the Israelites through the wilderness, Joshua’s role is to secure their inheritance in Canaan. The transition underscores Joshua’s courage and obedience, as he faces the daunting task of conquering a heavily fortified region. His leadership is marked by faith in God’s promises and the ability to inspire loyalty among the people. The book portrays Joshua as a military strategist and a spiritual leader, ensuring the Israelites remain faithful to God’s commands. His succession signifies a new era for Israel, shifting from wanderers to settlers, with Joshua as the pivotal figure in this transformative period.

Key Events in the Book of Joshua

The book recounts the Israelites’ crossing of the Jordan River, the miraculous fall of Jericho, the Battle of Ai, and the division of the Promised Land among the tribes.

The Conquest of Canaan

The conquest of Canaan, as detailed in the Book of Joshua, marks the fulfillment of God’s promise to the Israelites. Under Joshua’s leadership, the Israelites crossed the Jordan River miraculously and began their campaign to claim the land. The fall of Jericho, achieved without conventional weapons but through faith and obedience, stands as a pivotal moment. The subsequent battles, including the victory at Ai, demonstrated God’s intervention and the importance of adhering to His commands. The military strategies and divine miracles showcased God’s power and faithfulness, ensuring the Israelites’ success. This period laid the foundation for the Israelites’ establishment in the Promised Land, highlighting themes of trust, courage, and divine providence.

The Battle of Jericho and Ai

The Battle of Jericho and Ai are pivotal events in the Book of Joshua, showcasing God’s intervention and the Israelites’ faith. Jericho, the first major city in Canaan, was conquered miraculously when its walls collapsed after the Israelites marched around it for seven days, obeying God’s instructions. This victory demonstrated God’s power and established Joshua’s leadership. Following Jericho, the Israelites faced defeat at Ai initially due to Achan’s disobedience in taking forbidden spoils. After Achan’s sin was addressed and punishment carried out, the Israelites successfully captured Ai, highlighting the importance of obedience and holiness. These battles exemplify the interplay of faith, obedience, and divine intervention, setting the tone for the conquest of Canaan.

The Division of the Promised Land

The division of the Promised Land is a central theme in the Book of Joshua, marking the fulfillment of God’s promise to the Israelites. After the conquest of Canaan, Joshua allocated the land among the twelve tribes of Israel, ensuring each received an inheritance. This process was guided by God’s instructions and involved casting lots to determine territorial boundaries. The Levites, however, did not receive land, as they were dedicated to priestly service and instead were given cities and suburbs for residence. The division symbolized God’s faithfulness and the transition of the Israelites from a wandering people to a settled community. This orderly distribution underscored Joshua’s leadership and the importance of obedience to God’s plan, ensuring each tribe had a place in the land promised to their ancestors.

Theological Themes in the Book of Joshua

The Book of Joshua emphasizes God’s faithfulness, divine sovereignty, and the importance of obedience. It highlights the fulfillment of covenant promises and the necessity of trusting and following God’s guidance, reflecting themes of trust, leadershi

God’s Faithfulness to His People

The Book of Joshua underscores God’s unwavering faithfulness to His people, fulfilling promises made to Abraham, Isaac, and Jacob. The Israelites’ journey into Canaan exemplifies divine providence, as God guides them through miraculous events like the parting of the Jordan River and the fall of Jericho. These acts demonstrate His commitment to giving them the Promised Land, reinforcing their identity as His chosen people. The conquests and victories are not just military successes but manifestations of God’s covenant loyalty. Joshua’s leadership serves as a vessel for God’s plan, showing that trust in Him leads to triumph. This theme encourages believers to rely on God’s promises, emphasizing that His faithfulness endures even in challenging circumstances. Through Joshua’s story, the Bible teaches that obedience and trust in God’s plan are essential for experiencing His faithfulness and provision.

The Importance of Obedience and Courage

The Book of Joshua highlights the crucial role of obedience and courage in fulfilling God’s plan. Joshua’s leadership exemplifies these qualities as he trusts God’s instructions, even in daunting situations like the conquest of Jericho. The Israelites’ success in Canaan is directly tied to their obedience to God’s commands, demonstrating that faith and courage are essential for overcoming challenges. Joshua’s courage is evident when he leads the people across the Jordan River and into battle, showing reliance on divine guidance. This theme encourages readers to embrace obedience and courage in their own lives, trusting that God’s plans are greater than human understanding. The book emphasizes that true strength comes from following God’s will, even when the path seems uncertain or difficult. Through Joshua’s story, the Bible teaches that obedience and courage are vital for achieving spiritual and earthly victories.

The Book of Joshua underscores God’s faithfulness and the importance of trust, obedience, and courage. It serves as a timeless reminder of divine promises and leadership, inspiring modern readers to rely on faith and perseverance in fulfilling their own calling and overcoming life’s challenges.

The Book of Joshua’s Significance in Biblical History

The Book of Joshua is pivotal in biblical history, marking the transition from the wilderness wanderings to the conquest of Canaan, fulfilling God’s promise to Abraham. It bridges the narrative between Deuteronomy and the Judges, showcasing Israel’s obedience to God’s commands and the fulfillment of divine promises. The book emphasizes God’s sovereignty and faithfulness, demonstrating His involvement in history through miraculous events like the fall of Jericho. Joshua’s leadership solidifies Israel’s identity as God’s chosen people, highlighting themes of faith, courage, and obedience. The conquest of Canaan establishes Israel in the Promised Land, setting the stage for future kingdoms and covenants. Theologically, Joshua’s story underscores the importance of trusting God’s plan and leadership, making it a cornerstone of Israel’s history and a foundation for understanding God’s redemption plan. Its lessons remain central to biblical theology and Christian application today.

Modern Applications and Lessons

The Book of Joshua offers timeless lessons for modern believers, emphasizing trust in God’s plan, courage in the face of challenges, and the importance of obedience. Joshua’s leadership exemplifies faith in action, encouraging believers to step out in confidence, even when the task seems daunting. The conquest of Canaan reminds us that God’s promises are fulfilled through faith and perseverance. Today, these themes inspire individuals to trust God in uncertain circumstances, fostering courage and resilience. The book also highlights the value of community and unity, as the Israelites worked together to claim their inheritance. For modern readers, Joshua’s story serves as a powerful reminder of God’s faithfulness and the importance of living according to His will, providing practical lessons for personal and collective growth in faith and leadership.

Continue Reading

the cine lens manual

The Cine Lens Manual is a comprehensive guide to cinema optics, blending art and science. Written by experts Jay Holben and Christopher Probst, it offers clear, illustrated insights for all filmmakers.

Overview of the Comprehensive Guide

The Cine Lens Manual is a detailed exploration of cinema optics, offering insights into the art, science, and history of cinematographic lenses. Designed for filmmakers of all levels, it covers fundamental concepts, optical principles, and practical applications. With extensive illustrations and clear language, it serves as both an educational resource and a practical reference. The manual bridges technical and creative aspects, making it indispensable for understanding lens design, functionality, and their impact on visual storytelling in modern and historical contexts.

Authors and Their Expertise

Authors Jay Holben and Christopher Probst bring over 60 years of combined experience in cinematography, education, and technical journalism. Holben, a renowned director and producer, and Probst, an ASC member, offer deep insights into cinema optics. Their expertise spans lens design, optical principles, and practical applications, making them trusted authorities in the field. This collaboration ensures the manual is both comprehensive and accessible, catering to professionals and enthusiasts alike.

Key Features of the Manual

The Cine Lens Manual is a detailed resource covering optics, design, and history. It features clear language, extensive illustrations, and practical applications. The manual includes chapters on lens basics, optical concepts, and customization, making it a versatile guide for filmmakers. Its accessible style ensures complex topics are understandable, catering to all skill levels. This comprehensive guide is essential for cinematographers, directors, and anyone seeking a deeper understanding of cinema optics.

Understanding the Basics of Cine Lenses

The Cine Lens Manual introduces fundamental concepts of cinema optics, explaining how lenses function and their role in capturing images. It explores optical principles and their filmmaking applications.

Defining the Lens: Fundamental Concepts

A cine lens is a precision optical instrument designed to capture images for filmmaking. It consists of glass or plastic elements arranged to focus light onto a camera sensor or film. Key concepts include focal length, which determines the angle of view, and aperture, controlling light entry and depth of field. Lenses also feature mechanical components like focus and zoom controls. Understanding these basics is essential for harnessing the lens’s creative potential in storytelling and visual expression, as detailed in The Cine Lens Manual.

Optical Principles and Their Role in Filmmaking

Optical principles form the backbone of cine lens functionality. Refraction and diffraction dictate how light behaves through the lens, influencing image sharpness and clarity. Chromatic aberration control ensures accurate color reproduction, while depth of field management shapes the visual narrative. These principles are crucial for achieving desired aesthetic effects, such as bokeh or selective focus, enabling filmmakers to craft compelling visual stories. The Cine Lens Manual elaborates on these principles, providing a foundation for both technical and creative decision-making in cinematography.

Design and Construction of Cine Lenses

Cine lenses are crafted with precision, blending optical and mechanical excellence. Advanced engineering ensures optimal performance, while customization options empower filmmakers to tailor visuals to their artistic vision.

Optical Designs in Action

Optical designs in cine lenses are a perfect balance of art and science, ensuring exceptional image quality. From anamorphic to spherical designs, each type offers unique visual characteristics. Advanced coatings minimize flares and distortions, while aspherical elements enhance sharpness. Modern designs cater to Ultra HD 8K standards, delivering pristine clarity. Customizable options allow filmmakers to achieve distinct looks, making optical design a critical tool in storytelling. The evolution of optical technology continues to push creative boundaries, providing cinematographers with precise control over their visual narratives.

Mechanical Aspects of Lens Construction

The mechanical construction of cine lenses is meticulously engineered for precision and durability. High-quality materials ensure robustness, while focus and zoom mechanisms provide smooth, accurate control. The design emphasizes ergonomic functionality, with features like interchangeable mounts and modular components. Weather-sealing and precise gear systems enhance reliability in demanding environments. These mechanical aspects are crucial for maintaining optical performance and enabling filmmakers to achieve consistent, high-quality results. Every detail is crafted to support the creative process, ensuring lenses are both tools and extensions of the cinematographer’s vision.

History and Evolution of Cinematographic Lenses

The history of cinematographic lenses traces the evolution from early optical designs to modern innovations, shaped by technological advancements. Jay Holben and Christopher Probst detail this journey in The Cine Lens Manual, exploring how lens developments have influenced filmmaking aesthetics and techniques over the decades.

Historical Development of Lens Technology

The evolution of cinematographic lenses began with early optical designs inspired by photography. Innovations like anamorphic lenses in the 1950s revolutionized widescreen formats. Advances in materials and coatings improved image quality, while modern designs integrate digital metadata. The Cine Lens Manual traces this journey, detailing how lens technology has adapted to filmmaking needs, from silent films to contemporary digital cinema, shaping visual storytelling and artistic expression.

Impact of Lens Innovations on Filmmaking

Lens innovations have profoundly shaped filmmaking, enabling new creative possibilities. Advances in optics and mechanics allowed for improved depth of field control and image quality. Anamorphic lenses introduced unique visual aesthetics, while high-speed lenses enhanced low-light shooting. These developments democratized filmmaking, making advanced techniques accessible to all levels of productions. The Cine Lens Manual explores how such technological leaps have empowered filmmakers to push boundaries, transforming the medium and enriching visual storytelling across genres and generations.

Practical Applications and Customization

The Cine Lens Manual explores how filmmakers apply lenses in modern productions, emphasizing customization to meet creative demands. It highlights versatility and performance in tailoring optics for unique storytelling needs.

Utilizing Lenses in Modern Filmmaking

The Cine Lens Manual dives into the practical applications of cinema lenses in contemporary filmmaking, covering technical and aesthetic considerations. It explores how modern lenses are tailored for 8K resolution, anamorphic shooting, and specialized effects. The guide emphasizes customization options, such as modifying focus throws and coatings, to meet specific creative needs. By bridging the gap between theory and practice, the manual empowers filmmakers to make informed decisions, ensuring lenses are integral to their storytelling process. This section is invaluable for cinematographers, directors, and crew seeking to maximize lens capabilities in modern productions.

Modifying and Customizing Cine Lenses

Modifying and Customizing Cine Lenses explores how filmmakers tailor optics to meet specific creative needs. From adjusting focus throws to swapping lens coatings, these tweaks enhance performance and aesthetics. The manual details optical and mechanical customizations, such as anamorphic lens adapters or vintage-style modifications, to achieve unique visual effects. It also covers practical examples, like optimizing lenses for 8K resolution or specialized lighting conditions, ensuring filmmakers can adapt their tools for diverse storytelling demands. This section highlights the versatility of cine lenses in modern cinematography.

Evaluation and Testing of Cine Lenses

The Cine Lens Manual outlines advanced techniques for testing lenses, ensuring optimal performance in filmmaking. It details methods to evaluate sharpness, contrast, and distortion, providing clear metrics for lens assessment.

Methods for Testing and Qualifying Lenses

The Cine Lens Manual details rigorous testing processes to ensure lens performance. Key methods include evaluating sharpness, contrast, and distortion using resolution charts under controlled conditions. Additional tests assess flare, veiling glare, and chromatic aberration to determine optical integrity. Mechanical inspections verify focus and zoom accuracy, crucial for cine lenses. These systematic approaches ensure lenses meet high standards, providing filmmakers with reliable tools for capturing cinematic excellence.

Understanding Lens Performance Metrics

Performance metrics are crucial for evaluating lens quality. The Cine Lens Manual explains key parameters such as MTF (Modulation Transfer Function) for sharpness, T-stop for light transmission, and distortion percentages. These metrics help cinematographers assess optical precision and consistency. Additionally, the manual covers chromatic aberration, focus breathing, and lens flare, providing a detailed framework to understand and select the right lens for specific creative and technical demands in filmmaking.

Continue Reading

print to pdf black and white

Printing PDFs in black and white is a practical solution for reducing costs and enhancing readability. It’s ideal for documents where color isn’t essential, ensuring clarity and professionalism while conserving ink or toner. This method is particularly useful for textual content, drafts, and environments where color printing isn’t required. By converting PDFs to grayscale or monochrome, users can achieve high-quality outputs efficiently, making it a preferred choice for both personal and professional needs.

1.1 Benefits of Black and White PDF Printing

Printing PDFs in black and white offers numerous advantages, including cost savings, reduced ink or toner consumption, and faster printing speeds. It eliminates the need for color ink, making it ideal for budget-conscious users. Black and white printing also ensures consistent and professional outputs, especially for textual content. Additionally, it reduces environmental impact by minimizing resource usage. Many printers prioritize monochrome printing, leading to quicker processing times. This method is also beneficial for readability, as it enhances text clarity and focus. Furthermore, black and white PDFs are universally compatible across all printers, eliminating concerns about color accuracy. Overall, it’s a practical and efficient choice for everyday printing needs.

1;2 Common Scenarios for Black and White Printing

Black and white printing is commonly used for draft documents, invoices, receipts, and textual content where color isn’t necessary. It’s ideal for academic and professional settings, such as printing essays, reports, and presentations. Additionally, it’s widely used for reproducing photographs, diagrams, and charts in grayscale, ensuring clarity without unnecessary color. Many industries, like law and healthcare, rely on monochrome printing for records and forms. Home users often print receipts, tickets, and instructions in black and white to save resources. This method is also favored for large-scale printing projects, such as textbooks or manuals, due to its cost-effectiveness and simplicity. Its versatility makes it a go-to option for everyday printing needs across various sectors.

Configuring Print Settings for Black and White Output

Adjust printer properties to select grayscale or black and white options. Use software tools like Adobe Acrobat to convert PDFs to monochrome before printing for optimal results.

2.1 Adjusting Printer Properties for Black and White

Adjusting printer properties allows you to print PDFs in black and white efficiently. Open the printer settings dialog, typically by clicking the “Properties” or “Preferences” button in the print dialog. Navigate to the “Color” or “Ink” section and select “Grayscale” or “Black & White” to disable color printing. Some printers may offer additional options like toner-saving modes. Ensure the settings are applied before sending the document to print. This method works across various printer models and is compatible with both Windows and macOS systems. Always preview the settings to confirm the output will meet your requirements. Saving these configurations can streamline future printing tasks.

2.2 Using Acrobat or Reader for Grayscale Conversion

Adobe Acrobat and Reader offer built-in tools to convert PDFs to grayscale for black and white printing. Open the PDF in Acrobat or Reader, then go to File > Print. In the print dialog, select the printer and click “Properties.” Under the “Color” or “Quality” tab, choose “Grayscale” or “Black & White” to convert the document. This ensures the PDF is printed without color ink. For advanced settings, use the “Print Dialog Presets” to save custom configurations. Acrobat also allows previewing the grayscale output before printing, ensuring the result meets your needs. This method is ideal for maintaining document quality while reducing printing costs and ink consumption.

Printing Black and White PDFs on Different Platforms

Printing black and white PDFs is consistent across platforms like Windows, macOS, and Linux. Use universal print settings to ensure adaptability and high-quality monochrome output on any system.

3.1 Printing Black and White PDFs on Windows

On Windows, printing black and white PDFs is straightforward. Open the PDF in a reader like Adobe Acrobat or the built-in Windows Reader. Select “Print” from the File menu, choose your printer, and access its properties. Under the printer settings, select “Black and White” or “Grayscale” to avoid color printing. This ensures your PDF prints in monochrome, saving ink and toner. Windows also allows previewing the print settings before finalizing, ensuring clarity and correctness. For consistency, these steps work across most versions of Windows, making it a reliable method for black and white PDF printing.

3.2 Printing Black and White PDFs on macOS

Printing black and white PDFs on macOS is a seamless process. Open the PDF in Preview or any compatible viewer. Navigate to “File” > “Print,” then select your printer. In the print dialog, click “Show Details” to access advanced settings. Under the “Paper Handling” or “Color” options, choose “Black & White” or “Grayscale” to disable color printing. macOS ensures high-quality monochrome output, preserving clarity while reducing ink usage. Additionally, you can save these settings as a preset for future use, making the process even more efficient. This method is ideal for professional and personal documents, offering both convenience and cost-effectiveness.

3.3 Printing Black and White PDFs on Linux

Printing black and white PDFs on Linux is straightforward and efficient. Open the PDF using a viewer like Evince or Okular. Click “File” > “Print,” then select your printer. In the print dialog, navigate to the “Page Setup” or “Printer Settings” tab. Look for options like “Grayscale” or “Mono” to enable black and white printing. Some printers may offer additional settings for toner or ink savings. Linux also supports command-line printing, where you can use tools like lp with specific options to print in grayscale. This method ensures crisp, professional outputs while minimizing color ink consumption, making it ideal for both personal and professional use.

Using Specific Applications for Black and White PDF Printing

Applications like Microsoft Office Suite and Adobe Acrobat offer tools to print PDFs in black and white. They provide options to convert colors to grayscale or monochrome, ensuring efficient printing.

4.1 Microsoft Office Suite (Word, Excel, PowerPoint)

Microsoft Office applications provide straightforward options for printing PDFs in black and white. In Word, Excel, or PowerPoint, users can access print settings by selecting File > Print. Here, they can choose a printer and modify properties to print in grayscale or monochrome. This is particularly useful for documents with color text or graphics that aren’t essential. By converting to black and white, users save on ink and toner while maintaining document clarity. Additionally, these applications allow users to preview the output before printing, ensuring the final result meets their needs. This feature is especially beneficial for professional and academic settings where color isn’t required.

4.2 Adobe Acrobat and Reader

Adobe Acrobat and Reader offer robust tools for printing PDFs in black and white; Users can access these settings by opening the PDF and selecting File > Print. In the print dialog, choosing Advanced > Output allows conversion to grayscale or composite gray. This feature ensures that color-intensive documents are printed clearly in monochrome, preserving readability without unnecessary ink usage. Acrobat also provides preview options, enabling users to adjust settings before printing. This functionality is particularly useful for professional environments where precise control over print outputs is essential. By leveraging these features, users can efficiently manage their printing needs while maintaining document quality and reducing costs. This makes Adobe Acrobat a versatile tool for black and white PDF printing.

Browser-Based Solutions for Black and White Printing

Browsers like Chrome, Firefox, and Safari offer built-in print settings for black and white PDFs. Users can access these options through the print dialog, ensuring quick and consistent monochrome outputs.

5.1 Google Chrome

Google Chrome provides a seamless experience for printing PDFs in black and white. Users can access the print dialog by pressing Ctrl + P (Windows) or Cmd + P (Mac). From there, select the desired printer and choose the “More settings” option. Under “Color,” switch to “Black and white” to ensure the PDF prints without color. Chrome also allows saving the PDF directly in grayscale by selecting “Save as PDF” under the destination options. This feature is particularly useful for reducing ink consumption and ensuring compatibility with monochrome printers. Additionally, Chrome’s built-in PDF viewer simplifies the process of previewing and adjusting print settings before finalizing the output.

5.2 Mozilla Firefox

Mozilla Firefox offers a straightforward method for printing PDFs in black and white. To access this feature, open the PDF in Firefox and press Ctrl + P (Windows) or Cmd + P (Mac) to open the print dialog. From there, select the printer and click on the “Properties” or “Preferences” button. Under the “Color” or “Quality” section, choose the “Black & White” or “Grayscale” option to ensure the PDF prints without color. Firefox also supports saving the PDF in grayscale directly by selecting “Save as PDF” from the print dialog. This feature is cost-effective and ideal for users who prefer monochrome printing. Firefox’s built-in PDF viewer further enhances the experience by allowing quick previews before printing.

5.3 Safari

In Safari, printing PDFs in black and white can be done seamlessly by utilizing the browser’s built-in print dialog. Open the PDF in Safari and press Cmd + P to access the print settings. Under the printer options, select the “Paper Type/Quality” or “Color” dropdown menu and choose “Black & White” or “Grayscale” to disable color printing. Safari also supports saving the PDF in grayscale by selecting “Save as PDF” from the print dialog. This feature is beneficial for users aiming to reduce ink usage while maintaining document clarity. Safari’s integration with macOS ensures a smooth printing experience, allowing users to preview and adjust settings before finalizing the print job. This method is both efficient and environmentally friendly.

Best Practices for Optimizing Black and White PDFs

Optimizing black and white PDFs involves key strategies for clarity and efficiency. Adjust printer settings to grayscale or monochrome to avoid color ink use. Use tools like Adobe Acrobat for grayscale conversion. Preview documents in black and white to check for issues. Embed fonts and reduce image resolution to minimize file size. Save settings as defaults for future use. These practices enhance readability, reduce ink consumption, and are environmentally friendly. By following these steps, users ensure professional-quality outputs while lowering costs and supporting sustainability.

Continue Reading

5208 silent knight manual

The Silent Knight 5208 Manual provides essential guidance for installing, operating, and maintaining the SK-5208 Fire Control/Communicator, ensuring compliance with safety standards and optimal system performance.

1.1 Overview of the Silent Knight 5208 Fire Control/Communicator

The Silent Knight 5208 is a 10-zone fire alarm control panel, expandable to 30 zones, designed for reliable fire detection and communication. It features UL 864 listing, intelligent photoelectric smoke sensors, and a digital communicator for robust system performance. Suitable for commercial fire alarm systems, it ensures compliance with NFPA standards, offering advanced functionalities for safety and efficiency. Its modular design allows seamless integration with accessories like the SK-5235 touchpad, providing user-friendly control and monitoring capabilities.

1.2 Importance of the Manual for Installation and Operation

The manual is crucial for proper installation, programming, and operation of the SK-5208; It ensures compliance with fire safety codes like NFPA 72 and provides step-by-step instructions, preventing errors and ensuring system reliability. Technicians rely on it for configuring zones, connecting relays, and troubleshooting. Adhering to the manual’s guidelines guarantees optimal performance, safety, and adherence to industry standards, making it indispensable for installers and operators to maintain a reliable fire alarm system.

Features and Specifications of the SK-5208

The SK-5208 is a 10-zone fire alarm control panel, expandable to 30 zones, featuring UL 864 compliance, intelligent photoelectric smoke sensors, and a reliable digital communicator.

2.1 10-Zone Fire Alarm Control Panel (Expandable up to 30 Zones)

The SK-5208 is a versatile 10-zone fire alarm control panel, designed to support up to 30 zones with the use of SK-5217 Zone Expanders, offering flexibility for various system configurations. This expandability ensures the panel can adapt to growing security needs, making it suitable for both small and large facilities. The system’s modular design allows for seamless integration of additional zones, enhancing scalability without compromising performance or reliability.

2.2 UL 864 Listing and Compliance with NFPA 71 and 72

The SK-5208 is UL 864 listed, ensuring compliance with fire safety standards. It meets NFPA 71 and NFPA 72 requirements, guaranteeing reliable performance in fire alarm systems. This certification ensures the panel operates effectively under fire conditions, providing critical alerts and communication. Compliance with these standards is essential for system reliability and adherence to fire safety codes, making the SK-5208 a trusted solution for fire alarm installations.

2.3 Intelligent Photoelectric Smoke Sensors

The SK-5208 features advanced intelligent photoelectric smoke sensors, designed for accurate fire detection. These sensors minimize false alarms by distinguishing between smoke particles and other environmental factors. With UL 864 listing and compliance with NFPA 71 and 72, they ensure reliable performance in fire alarm systems. Their intelligent technology enhances detection accuracy and system responsiveness, providing a robust solution for fire safety applications.

2.4 Digital Communicator for Reliable Fire Alarm Systems

The SK-5208’s digital communicator ensures seamless and reliable transmission of fire alarm signals to monitoring stations. UL 864 listed, it complies with NFPA 71 and 72 standards, guaranteeing efficient communication in emergencies. This feature enhances system reliability, enabling swift response to alarms. Its advanced technology integrates with the control panel, ensuring accurate and timely signal transmission, which is crucial for fire safety and emergency management systems. This communicator is a vital component of the SK-5208’s comprehensive fire alarm solution.

Installation Requirements and Precautions

Proper grounding and static protection are critical for the SK-5208. Use a wrist strap when handling components to prevent damage. Follow safety guidelines for installation.

3.1 Grounding and Static-Sensitive Components

Proper grounding is essential for the SK-5208 to ensure reliable operation and prevent damage. Static-sensitive components require careful handling. Always use a wrist strap connected to a grounded surface when working with the panel. Avoid touching circuit boards or components without proper grounding to prevent static discharge. Grounding ensures system stability and protects against electrical interference. Failure to ground the system can lead to malfunctions or damage. Follow all safety guidelines for handling static-sensitive devices to maintain optimal performance and longevity of the control panel.

3.2 Mounting the SK-5208 Panel

The SK-5208 panel must be mounted in a central, easily accessible location, ensuring compliance with local fire codes. Use the provided mounting hardware to secure the panel to a sturdy surface. The panel’s weight and size require a stable installation to prevent damage. Mounting in a dry, cool environment is recommended to maintain optimal performance. Follow the manufacturer’s guidelines for installation height and clearance. Refer to the manual for detailed mounting instructions to ensure proper installation and system functionality. Proper mounting is critical for reliable operation and safety.

3.3 Wiring and Connection Guidelines

Proper wiring is critical for the SK-5208 panel’s functionality. Use approved wire gauges and ensure all connections are secure to prevent signal loss.Ground the panel correctly to avoid static damage, as static-sensitive components are present. Follow the manual’s wiring diagram for zone connections, power supply, and communicator setup. Avoid crossing wires to minimize interference. Test all connections post-installation to ensure reliability. Adhere to local electrical codes and manufacturer guidelines for a safe and compliant installation. Proper wiring ensures optimal system performance and reliability.

Programming the SK-5208 Panel

Program the SK-5208 panel to configure zones, set relay contacts, and enable advanced features. Refer to the manual for detailed instructions and examples, ensuring proper system customization.

4.1 Zone Configuration and Expansion Options

The SK-5208 panel supports up to 10 zones out of the box, expandable to 30 zones using the SK-5217 Zone Expander. This flexibility allows customization to suit various facility sizes and fire safety requirements. Zone configuration is detailed in the programming manual, ensuring proper setup for optimal performance. The system also integrates with a digital communicator for reliable alarm monitoring and reporting, meeting UL 864 and NFPA standards for fire alarm systems. Proper configuration ensures seamless operation and compliance with safety regulations.

4.2 Relay Contact Connections (Example: Door Holder Application)

The SK-5208 panel features programmable relay contacts for integrating auxiliary devices. Figure 3-10 in the manual illustrates relay connections for a door holder application, enabling automated door closure during alarms. Proper wiring ensures reliable operation, while the example provides a clear guide for similar setups. This functionality enhances system versatility and ensures compliance with fire safety codes, allowing seamless integration of additional safety mechanisms. Detailed instructions in the manual ensure correct implementation for optimal performance.

4.3 Advanced Programming Features

The manual details advanced programming options for the SK-5208, enabling custom configurations for enhanced fire safety. Features include zone-specific settings, custom alarm responses, and integration with auxiliary systems. Users can program relays for specialized applications and set up unique notification protocols. The SKSS software simplifies advanced programming tasks, allowing for tailored system responses. These features ensure the SK-5208 adapts to complex fire safety needs while maintaining compliance with fire codes and standards, providing a robust and flexible fire alarm solution.

Basic Operating Instructions

The SK-5208 manual provides clear steps for daily operations, including user key functions, touchpad navigation, and alarm acknowledgment procedures, ensuring smooth system management and compliance with fire safety standards.

5.1 User Key Operations

The SK-5208 manual details user key operations, enabling users to perform essential functions without requiring a user code. This includes resetting alarms, silencing notifications, and accessing basic system controls. The user key simplifies daily interactions, ensuring quick responses during emergencies. The control panel’s piezo sounder will continue to alert until all alarms are acknowledged. These operations are designed for ease of use, allowing personnel to manage the system efficiently while maintaining fire safety protocols.

5.2 On-Board Touchpad Functionality

The SK-5208 features an on-board touchpad designed for intuitive system control. Users can navigate through menus, acknowledge alarms, and access system status with ease. The touchpad interface streamlines operations, allowing quick access to critical functions. LED indicators provide visual feedback for user inputs, ensuring clear communication. This functionality enhances user experience, making it simple to interact with the fire control/communicator effectively, even during emergency situations.

5.3 Alarm Acknowledgment and Silencing Procedures

The SK-5208 control panel features a straightforward process for acknowledging and silencing alarms. Once an alarm is triggered, the system alerts users through visual and audible signals. Users can acknowledge alarms using the on-board touchpad or a user key, which temporarily silences the audible alerts. The piezo sounder will automatically silence after all alarms have been acknowledged. Proper alarm acknowledgment ensures timely response and system reset, maintaining fire safety and operational efficiency;

Maintenance and Troubleshooting

This section covers routine maintenance tasks and common troubleshooting steps to ensure the SK-5208 operates efficiently and addresses any issues promptly.

6.1 Routine Maintenance Tasks

Regular maintenance ensures the SK-5208 operates reliably. Ground yourself with a wrist strap to protect static-sensitive components. Clean smoke sensors monthly to prevent false alarms. Check all wiring connections for integrity. Test alarm functions and communication systems periodically. Replace batteries as specified. Inspect relays and contacts for wear. Update software if necessary. Refer to the manual for detailed procedures to maintain optimal performance and compliance with fire safety standards.

6.2 Common Issues and Solutions

Common issues with the SK-5208 include false alarms from dirty smoke sensors, communication failures, and power supply problems. Clean sensors monthly to prevent false alarms. Check wiring connections for integrity and ensure proper grounding. Verify that the digital communicator is functioning correctly. For power issues, ensure the system is receiving the correct voltage and that batteries are charged. Refer to the manual for troubleshooting steps and solutions to maintain compliance with UL 864 and NFPA 72 standards.

6.3 Repair Kits and Replacement Parts

For the SK-5208, Silent Knight offers repair kits like the UDC3000/UDC3300 repair kit (Art. 51-52-33-01E) and replacement parts such as the 5280 Status Display Module. These kits ensure quick fixes for common issues. Always use genuine parts to maintain system integrity and compliance with UL 864. Contact Silent Knight Sales at 800-328-0103 for ordering. Proper installation of replacement parts is critical to avoid system malfunctions and ensure reliability in fire alarm operations. Refer to the manual for part compatibility and installation guidelines.

Compliance and Fire Code Requirements

The SK-5208 complies with UL 864 and NFPA 71, 72 standards. Ensure instructions are displayed next to the panel as per NFPA 72 fire code requirements.

7.1 NFPA 72 Standards for Fire Alarm Systems

NFPA 72 outlines requirements for fire alarm systems, including installation, maintenance, and testing. The SK-5208 complies with these standards, ensuring reliable performance and safety. Proper installation and operation as per NFPA 72 are critical for system effectiveness. Regular inspections and testing must be conducted to maintain compliance and ensure all components function correctly. Adherence to these standards helps protect lives and property by providing a robust fire alarm system.

7.2 Displaying Instructions Next to the Panel

NFPA 72 requires that operating instructions be displayed next to the SK-5208 panel. These instructions must be framed and easily accessible to ensure compliance. They provide critical information for system operation, troubleshooting, and maintenance. Proper display ensures that users can quickly reference procedures during emergencies or routine tasks, promoting safety and efficiency. Legibility and proximity to the panel are essential for adherence to fire safety regulations and optimal system management.

7.3 UL Listings and Certifications

The SK-5208 is UL 864 listed and complies with NFPA 71 and 72 standards, ensuring reliability and safety. UL certification validates the panel’s performance under rigorous testing, meeting industry standards for fire alarm systems. This certification is crucial for system approval and ensures compliance with local fire codes. The UL mark confirms the panel’s adherence to safety and operational requirements, providing assurance to installers, authorities, and end-users of its quality and reliability in critical fire alarm applications.

Additional Resources and Support

Visit Silent Knight’s official website for manuals, downloads, and SKSS software. Contact technical support at 800-328-0103 for assistance. Additional resources include user guides and repair kits.

8.1 Silent Knight Website and Downloads

Visit the official Silent Knight website for comprehensive resources, including the SK-5208 manual, SKSS software, and technical documents. Downloads are available for easy access to installation guides, operational manuals, and programming instructions. Ensure compliance with fire codes by referencing the latest updates and support materials. The website also provides links to troubleshooting guides and repair kits, making it a one-stop solution for all your fire control/communicator needs.

8.2 Technical Support and Sales Contact Information

For assistance with the SK-5208, contact Silent Knight Technical Support at 800-328-0103. Sales inquiries can also be directed to this number. Support is available for troubleshooting, system repairs, and general questions. Visit the Silent Knight website for additional contact options, including email and online forms. The website also provides access to a dedicated support team and resources for resolving common issues. Ensure timely resolution by reaching out to their experienced professionals.

8.3 SKSS Software Availability

The SKSS software is available for download on the Silent Knight website at www.silentknight.com. It is essential for programming and configuring the SK-5208 panel. After downloading, refer to the installation manual (P/N 151240) for guidance. The software enhances system functionality and ensures compliance with fire safety standards. Additional resources and support are also accessible on the Silent Knight website to assist with software installation and operation.

Continue Reading